In a world filled with mass-produced items and rapidly changing technology, there's a timeless craft that continues to captivate and endure – hook knife carving. This centuries-old technique allows artisans to create intricate, detailed works of art that stand the test of time. In this article, we'll delve into the world of Hook Knife Carving, exploring its history, techniques, and the significance of intricate details in this remarkable craft.
Creating intricate details with hook knife carving techniques
Introduction
The rich history of hook knife carving
Hook Knife Carving is an ancient craft that can be traced back to the indigenous people of various regions around the world. From the Inuit people of the Arctic to the Maori of New Zealand, and many others in between, these artisans have relied on the humble hook knife to shape wood into functional tools, art, and objects of cultural significance.
The history of Hook Knife Carving is a testament to the human spirit and the enduring appeal of craftsmanship. These artisans utilized simple, yet effective tools, handed down through generations, to create functional tools, art pieces, and objects of cultural significance. They carved intricate designs, often inspired by their natural surroundings, reflecting a deep connection to the environment.
The art of hook knife carving
Hook Knife Carving, often referred to as "spoon carving," involves using a hook knife – a small, curved blade with a hook-like end – to carve and shape wood. The skill lies not only in the design and execution but also in the choice of wood. Experienced artisans carefully select their materials, considering grain patterns, texture, and durability.
Tools of the trade
To become proficient in Hook Knife Carving, one must first acquire the essential tools:
-
Hook knife: This is the primary tool, available in various shapes and sizes to suit different carving needs.
-
Wood selection: Choosing the right type of wood is crucial. Hardwoods like cherry, walnut, and oak are often preferred for their durability and finish.
-
Sharpening equipment: Keeping your tools sharp is essential. A sharp blade ensures precision in your work.
-
Safety gear: Safety first! Protective equipment like gloves and eye protection should be used to prevent accidents.
The craftsmanship
The true beauty of Hook Knife Carving lies in the intricate details that can be achieved. Artisans employ various techniques to bring their creations to life:
-
Carving techniques: The artisan's control over the hook knife allows for precise cuts and intricate detailing.
-
Design and patterns: Patterns are often inspired by nature, folklore, and personal creativity. These intricate designs are a hallmark of Hook Knife Carving.
-
Finishing: A well-crafted piece is not complete without proper finishing. Sanding, oiling, and sometimes painting enhance the final product.
Why intricate details matter?
In a world of mass production and quick fixes, Hook Knife Carving stands as a testament to the value of intricate details. Here are a few reasons why these details matter:
Unique artistry
Each Hook Knife Carving piece is unique, showcasing the artisan's individual style, creativity, and craftsmanship. The intricate details set these pieces apart, making them highly sought after by collectors and enthusiasts.
Cultural significance
Many indigenous cultures around the world have used Hook Knife Carving to create objects of cultural significance. These intricate carvings often tell stories, preserve traditions, and serve as valuable cultural artifacts.
Sustainability
In a time when sustainability is a growing concern, Hook Knife Carving emphasizes the use of natural materials and traditional techniques. This focus on sustainability resonates with those who value eco-friendly practices.
Handmade craftsmanship
In a world of mass-produced items, there's a growing appreciation for handcrafted goods. Hook Knife Carving provides a unique way to own something truly one-of-a-kind.
Hook Knife Carving is a timeless craft that deserves recognition for its rich history, intricate techniques, and the significance of intricate details. As you explore this world of craftsmanship, you'll find a deep appreciation for the artistry, cultural significance, and sustainability it embodies. Each piece is a masterpiece, a unique creation that transcends time.
The basics of hook knife carving
Hook Knife Carving is a captivating craft that allows artisans to create intricate and beautiful wooden pieces. To master this art, it's crucial to understand the basics. In this article, we'll delve into the essential components of Hook Knife Carving, including understanding hook knives, the necessary tools and materials, and important safety precautions.
Understanding hook knives
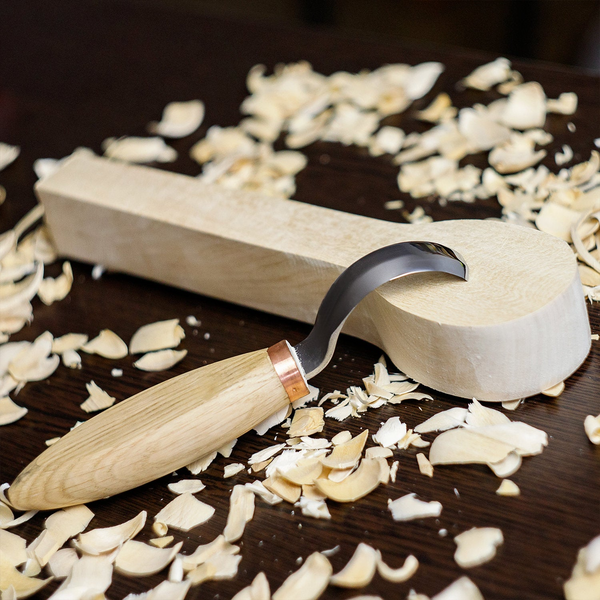
The anatomy of a hook knife
Before diving into the world of Hook Knife Carving, it's essential to comprehend the tool itself. Hook knives, also known as spoon knives, are specially designed blades with a distinctive curved and hooked tip. The unique shape of the blade is what makes it perfect for carving concave and rounded surfaces with precision.
Types of hook knives
There are various types of hook knives available, each with its own purpose:
-
Single-edged hook knife: This is the most common type, featuring a single-edged blade that's curved on one side. It's versatile and suitable for general carving.
-
Double-edged hook knife: As the name suggests, this knife has curved edges on both sides, allowing for more flexibility in carving.
-
Compound curved hook knife: This tool has a curved edge on one side and a compound curve on the other, ideal for complex carving projects.
-
Right-handed and left-handed hook knives: Some hook knives are designed for either right-handed or left-handed users, so choose one that suits your dominant hand.
Essential tools and materials
Selecting the right wood
The choice of wood is paramount in Hook Knife Carving. Hardwoods like cherry, walnut, and oak are popular choices due to their durability and beautiful grain patterns. Softwoods like cedar and pine are suitable for beginners due to their ease of carving.
Sharpening equipment
Maintaining the sharpness of your hook knife is crucial for precise carving. Invest in a quality sharpening stone or a honing guide to keep your tools in top condition.
Safety gear
Safety should never be overlooked in Hook Knife Carving. Always use the following safety equipment:
-
Cut-resistant gloves: These gloves protect your hands from accidental slips or cuts.
-
Eye protection: Tiny wood chips can fly during carving, so wearing safety glasses is essential.
-
Dust mask: Carving produces fine wood dust that can be harmful when inhaled, so a dust mask is a must.
Workbench and clamp
A sturdy workbench is essential for stability during carving. Additionally, a clamp can hold your workpiece securely in place, preventing any unwanted movement.
Optional tools
Depending on the complexity of your projects, you may also need:
-
Spoon carving tools: These include straight gouges and bent gouges for hollowing and shaping.
-
Sanding tools: Sandpaper or sanding pads to smoothen your work.
Safety precautions
Safety should always be a top priority in Hook Knife Carving:
-
Proper technique: Learn the correct techniques and practice them. Proper hand positioning and control are crucial.
-
Keep tools sharp: A sharp knife is safer to use than a dull one, as it requires less force.
-
Carve away from your body: Always carve in a direction away from your body to avoid accidents.
-
Keep your work area clean: A clutter-free workspace reduces the risk of accidents.
-
Take breaks: Carving can be physically demanding. Take regular breaks to prevent fatigue.
-
Respect the wood: Wood can be unpredictable. Be cautious, especially when working on knots or irregular grain patterns.
-
Learn first aid: Have basic first-aid knowledge and supplies on hand in case of minor accidents.
In conclusion, Hook Knife Carving is a fascinating and rewarding craft, but it demands knowledge, precision, and safety awareness. Understanding your tools, selecting the right materials, and following safety precautions are the building blocks for success in this timeless art. By mastering these basics, you'll be well on your way to creating beautiful, intricate wooden masterpieces.
Exploring wood selection
In the world of Hook Knife Carving, the selection of wood plays a pivotal role in determining the outcome of your intricate carving projects. To truly master this art, it's crucial to explore the various aspects of wood selection. In this article, we will delve into the different types of wood suitable for intricate carving, as well as the influence of grain patterns in this captivating craft.
Types of wood for intricate carving
Not all woods are created equal when it comes to Hook Knife Carving. The choice of wood can significantly impact the ease of carving, the final aesthetics of your work, and its durability. Here are some wood types that are particularly well-suited for intricate carving:
1. Cherry wood
Cherry wood is a favorite among carvers for its beautiful, fine grain and light color. It carves smoothly and takes detail exceptionally well. The warm, reddish hue that develops over time adds to the charm of the finished piece.
2. Walnut wood
Walnut is known for its rich, dark brown color and striking grain patterns. It carves beautifully, and the contrast between the light and dark areas of the wood can highlight intricate details, making it an excellent choice for carving fine motifs.
3. Oak wood
Oak is a sturdy hardwood that is not only durable but also provides an interesting grain pattern. The texture and distinct grain lines can add character to your carving, especially if you're looking to create pieces with a rustic or antique appearance.
4. Maple wood
Maple is a hard, dense wood with a fine grain that carves well. It is often used for detailed work where precision is essential. Its pale, creamy color can be stained or finished in various ways to achieve the desired look.
5. Basswood
Basswood is a softwood that is popular among beginners due to its ease of carving. While it's not as durable as hardwoods, it's an excellent choice for practice and for creating intricate, delicate carvings.
Grain patterns and their influence
Understanding the grain patterns in wood is essential for Hook Knife Carving, as they have a significant impact on the final appearance of your work:
1. Straight grain
Wood with a straight grain pattern is relatively easy to carve. It allows for clean, smooth cuts and is ideal for detailed work where precision is required.
2. Curly grain
Curly grain wood exhibits irregular, wavy patterns that can add character to your carvings. However, it can be more challenging to work with, as the grain may change direction unpredictably.
3. Knots and burl
Knots in the wood, as well as burl wood, can create interesting focal points in your carving. However, they are typically harder and may require special tools to work around or through.
4. Cross grain
Carving across the grain can be challenging, as it may result in tear-out or splintering. It's important to adapt your techniques when working with cross grain sections.
5. End grain
End grain is the surface cut perpendicular to the wood's growth rings. It can be tough to carve and may require additional effort and tools.
In conclusion, the choice of wood for Hook Knife Carving is a critical decision that directly impacts the quality and aesthetics of your creations. Understanding the different types of wood and their grain patterns is fundamental to mastering this craft. By selecting the right wood and working with the grain, you can bring out the full potential of intricate carving projects, creating stunning pieces that stand the test of time.
Preparing your workspace
A well-organized and efficient workspace is a cornerstone of successful Hook Knife Carving. Whether you're a seasoned artisan or just starting out, the way you set up and maintain your carving area can significantly impact the quality of your work. In this article, we will explore the essential steps to prepare your workspace for Hook Knife Carving, including setting up the carving area and organizing your tools and materials.
Setting up the carving area
1. Choosing the right location
Select a quiet and well-lit area for your carving workspace. Natural light is ideal, but if that's not possible, invest in bright, white lighting that minimizes shadows on your work.
2. Sturdy workbench
A sturdy workbench is essential for stability during carving. Ensure it is at a comfortable height for you to work on. Consider a workbench with clamps to secure your workpiece.
3. Adequate ventilation
Carving can produce fine wood dust, which can be harmful to your health when inhaled. Ensure your workspace is well-ventilated or consider wearing a dust mask to protect your lungs.
4. Safe flooring
The floor of your workspace should be easy to clean, as wood shavings and chips will accumulate. A hard, smooth surface is preferable to avoid trip hazards.
Organizing tools and materials
1. Tool storage
Invest in a tool storage system to keep your hook knives, gouges, and other carving tools organized and within reach. A pegboard or a tool chest with compartments can be very helpful.
2. Wood storage
Store your wood selection in a dry area, away from direct sunlight. Properly stack and organize your wood to prevent warping or moisture damage.
3. Safety equipment
Have safety equipment like cut-resistant gloves, safety glasses, and a first-aid kit readily available in your workspace. Safety should always be a top priority.
4. Workpiece organization
If you're working on multiple projects, label and organize your workpieces to avoid confusion. Keep a notebook or digital record of your works in progress.
5. Waste disposal
Have a designated area for waste disposal, such as a trash can or bin for wood shavings and scraps. Regularly empty it to maintain a clean workspace.
6. Cleaning supplies
Keep cleaning supplies like brushes, brooms, and dustpans handy for routine cleanup. A clean workspace ensures a safe and efficient carving environment.
7. Inspiration board
Consider setting up an inspiration board in your workspace. Pinning sketches, photographs, or other art that inspires you can keep your creative juices flowing.
8. Reference material
Keep reference books, magazines, or printouts of carving designs and techniques nearby. These can be invaluable resources as you work on intricate projects.
In conclusion, the key to successful Hook Knife Carving is an organized and safe workspace. By carefully setting up your carving area and efficiently organizing your tools and materials, you create an environment that not only enhances your productivity but also ensures the longevity of your craft. With a well-prepared workspace, you're ready to embark on intricate carving projects that will be both satisfying and visually stunning.
Mastering knife handling
Mastering the art of Hook Knife Carving begins with honing your knife handling skills. From the various grips and techniques to understanding common mistakes to avoid, precision and safety are key. In this comprehensive guide, we will delve into the world of knife handling for Hook Knife Carving, providing insights into the essential grips and techniques, while highlighting common pitfalls to steer clear of.
Grips and techniques
1. The basic grip
The basic grip is your starting point. Hold the knife handle firmly with your dominant hand while placing your non-dominant hand on the blade's back for support. This grip provides control and stability, making it ideal for initial cuts and shaping.
2. The choking grip
The choking grip involves holding the knife closer to the blade. This technique is useful for detailed work, allowing for precise, controlled cuts. It's essential for creating intricate designs and fine patterns.
3. The power grip
When more force is needed, the power grip comes into play. Grasp the handle with your dominant hand and use your non-dominant hand to push down on the blade. This grip offers greater strength and control for removing larger chunks of wood.
4. The push cut
In a push cut, the blade is moved away from your body. This technique is safe and efficient for making straight cuts and is often used for rough shaping.
5. The pull cut
Conversely, the pull cut involves drawing the blade toward your body. This technique is ideal for finishing cuts and creating smoother surfaces.
6. The scoop cut
The scoop cut is perfect for hollowing and creating concave shapes. It's executed by angling the blade and carefully scooping out wood while maintaining control.
Common mistakes to avoid
1. Rushing
One of the most common mistakes in knife handling is rushing. Carving is a patient, detail-oriented process. Rushing can lead to errors and accidents. Take your time, and focus on precision.
2. Poorly maintained tools
Neglecting tool maintenance can lead to accidents and poor results. Keep your knives sharp and in good condition. Dull blades require more force, increasing the risk of slips.
3. Incorrect knife selection
Using the wrong knife for a particular task is a recipe for frustration. Each knife has its purpose, so ensure you select the appropriate one for your project.
4. Inadequate safety precautions
Safety should never be underestimated. Failing to wear protective gear like cut-resistant gloves and safety glasses can result in injuries. Always prioritize safety in your carving workspace.
5. Neglecting wood grain
Fighting against the grain can lead to difficulties and poor results. Pay close attention to the wood's grain pattern and adjust your technique accordingly.
6. Lack of planning
Beginners sometimes start carving without a clear plan or design. This can lead to confusion and errors. Always have a design or pattern in mind before starting a project.
7. Overexertion
Excessive force is often unnecessary and can lead to mistakes. Let the sharpness of your tools do the work. Applying too much pressure can cause accidents.
In conclusion, mastering knife handling is a fundamental aspect of Hook Knife Carving. With the right grips and techniques, combined with an understanding of common mistakes to avoid, you'll not only create intricate and beautiful works of art but also ensure your safety throughout the process. Remember, patience and practice are your allies on the path to becoming a skilled Hook Knife Carver.
Creating your design
In Hook Knife Carving, the process of bringing a piece of wood to life starts with envisioning and planning your design. This creative phase is where inspiration and careful planning come into play. In this guide, we'll explore the essential steps to help you create your design for Hook Knife Carving, including finding inspiration and the art of sketching and planning.
Finding inspiration
1. Nature's beauty
The natural world is a wellspring of inspiration for Hook Knife Carving. Observe the intricate patterns, shapes, and textures found in trees, leaves, flowers, and wildlife. These elements can serve as the foundation for your design.
2. Cultural influences
Explore various cultures and their art forms. Indigenous art, tribal designs, and traditional craftsmanship can offer unique and inspiring motifs for your carvings. Pay homage to the rich artistic history of different communities.
3. Personal stories
Your own experiences and stories can be a rich source of inspiration. Carve pieces that hold personal significance, commemorate memories, or convey emotions. Your carvings can become a form of self-expression.
4. Historical and mythological themes
Delve into history and mythology for compelling themes. Characters, legends, and stories from the past can be reimagined in wood, creating captivating and intricate carvings.
5. Architectural elements
Consider incorporating architectural details, such as Gothic motifs or Art Nouveau curves, into your designs. These elements can add a unique and artistic touch to your work.
Sketching and planning
1. Sketch your vision
Once you've found inspiration, start by sketching your design on paper. This initial sketch doesn't need to be highly detailed but should capture the essence of your vision. It serves as a blueprint for your carving.
2. Consider the wood
Take into account the type of wood you're working with. The wood's grain, color, and texture should complement your design. The characteristics of the wood can influence the final aesthetic of your carving.
3. Plan for depth
Intricate carvings often involve different layers and depths. Plan which parts of your design will be raised and which will be recessed. This adds dimension and complexity to your work.
4. Test your design
Before committing to the final piece, consider creating a small test carving. This allows you to experiment with the design, understand how the wood behaves, and make adjustments if necessary.
5. Safety first
As you plan your design, keep safety in mind. Avoid creating intricate, delicate details that may weaken the structural integrity of the piece or pose a safety hazard during carving or handling.
6. Adapt as you go
Be open to adapting your design as you progress with the carving. Sometimes, the wood may reveal unexpected patterns or possibilities that can enhance your work.
7. Seek feedback
Don't hesitate to share your design with peers or mentors. Constructive feedback can help you refine your ideas and improve your designs.
In conclusion, creating your design in Hook Knife Carving is a deeply creative and rewarding process. Finding inspiration from nature, culture, personal experiences, and history allows you to infuse meaning and depth into your work. Sketching and planning are the crucial steps that bridge the gap between your imagination and the final masterpiece. By taking your time and refining your design, you'll be well-prepared to embark on intricate and visually stunning carving projects.
Marking the layout
In Hook Knife Carving, marking the layout is a pivotal step that transforms your design from a concept into a tangible project. This process involves transferring your design onto the wood and creating a template that will guide your carving. In this guide, we will explore the essential steps to mark the layout for Hook Knife Carving, including transferring the design and crafting a template.
Transferring the design
1. Choose your transfer method
There are several methods to transfer your design onto the wood. The choice depends on your design complexity and personal preference:
-
Carbon paper: Place carbon paper between your design and the wood. Trace over the design with a pencil, transferring the image onto the wood.
-
Pounce wheel: Use a pounce wheel to perforate the design along the lines. Then, rub a powdered chalk or charcoal over the perforations, leaving an outline on the wood.
-
Freehand drawing: Skilled carvers may prefer to draw the design directly onto the wood with a pencil or chalk, using the initial sketch as a reference.
2. Be precise
Take your time when transferring the design. Precision is key to ensuring your final carving matches your vision. Check and recheck your work to avoid errors.
3. Consider grain direction
Pay attention to the wood's grain direction when transferring the design. Ensure that your design aligns with or complements the natural grain patterns of the wood.
Creating a template
1. Choose suitable template material
For a template, select a material that is easy to work with and sturdy. Common choices include cardboard, plastic, or thin plywood. The template should be slightly larger than your design to allow for adjustments during carving.
2. Trace your design
Place your design on the selected template material and trace the outline of your design. This will serve as the template that you'll use to replicate your design on the wood.
3. Cut and shape the template
Using a sharp knife or scissors, carefully cut out the template along the traced lines. Smooth any rough edges and ensure that the template is an accurate representation of your design.
4. Test the template
Before proceeding with the actual carving, it's advisable to test your template on a scrap piece of wood. This will help you ensure that it aligns well with the design and that any adjustments needed are made.
5. Secure the template
When you're satisfied with the template, secure it to the wood using clamps or adhesive. Make sure it doesn't shift during the carving process.
6. Safety considerations
Always keep safety in mind during this process. Be cautious when cutting the template material and take care to avoid injuries. Additionally, ensure that the wood is securely held while you work.
In conclusion, marking the layout in Hook Knife Carving is the bridge that connects your design to the actual carving process. Transferring your design accurately onto the wood and creating a template are critical steps that set the foundation for your project's success. By taking the time to be precise and careful, you'll be well-prepared to bring your intricate carving design to life.
Starting your carving
Beginning your Hook Knife Carving journey is an exciting and creative endeavor. It all starts with making those initial cuts and developing a carving rhythm. In this guide, we will explore the crucial steps to kickstart your carving project, including making the initial cuts and finding your unique carving rhythm.
Making the initial cuts
1. Safety first
Before you begin making any cuts, ensure you are wearing all necessary safety gear, including cut-resistant gloves and safety glasses. Keep a first-aid kit within reach in case of minor accidents.
2. Start with the basics
Commence your carving project by making initial, shallow cuts that outline the basic shapes of your design. These cuts serve as guides for the more intricate work that follows.
3. Mind the grain
Pay close attention to the grain of the wood as you make your initial cuts. Carving with the grain is generally easier and yields smoother results. Carving against the grain can be more challenging and may require extra care.
4. Gradual progress
Avoid removing large chunks of wood in the beginning. Instead, make gradual, controlled cuts to shape the rough contours of your design. This gradual approach allows you to refine your work over time.
5. Check your progress
Periodically step back and evaluate your work. Ensure that your initial cuts align with your design and are proportional to the rest of the piece. Adjust as needed to maintain symmetry.
Developing a carving rhythm
1. Consistency is key
Establish a consistent rhythm while carving. This rhythm helps you maintain a steady pace and ensures a uniform finish. The more consistent your movements, the more precise your results.
2. Controlled pressure
Control the pressure you apply to the knife. Light, controlled pressure is often more effective than forceful movements. Let the sharpness of your tools do the work for you.
3. Focus on details
As you become more comfortable with your carving rhythm, start paying attention to finer details. Use different techniques and grips to create intricate designs and textures.
4. Practice patience
Hook Knife Carving is a patient art form. Be prepared to spend time on your project and don't rush. Delicate and intricate work requires a calm and patient approach.
5. Regular breaks
To avoid fatigue and maintain focus, take regular breaks. These pauses give you a fresh perspective on your work and help prevent errors caused by tiredness.
6. Embrace mistakes
Mistakes happen, even to seasoned carvers. Embrace them as opportunities to learn and improve. Sometimes, a mistake can lead to a unique and unexpected design element.
7. Enjoy the process
Remember to enjoy the process of carving. It's a form of artistic expression and can be deeply satisfying. Embrace the moments of creative flow and inspiration.
In conclusion, the journey of Hook Knife Carving starts with the initial cuts and the development of a carving rhythm. It's a process that combines technique, patience, and creativity. By taking a steady and controlled approach, you can bring your intricate carving project to life, one carefully crafted detail at a time.
Developing depth and texture
In the world of Hook Knife Carving, achieving depth and texture is where your creativity truly comes to life. It's a process that involves layering and shaping your work and adding intricate patterns that capture the essence of your design. In this guide, we will explore the crucial steps to develop depth and texture in your Hook Knife Carving projects, including layering and shaping, and adding intricate patterns.
Layering and shaping
1. Gradual progression
To create depth in your carving, work gradually. Start with shallow cuts and slowly deepen them as you progress. This approach allows for more control and precision in achieving the desired depth.
2. Experiment with layers
Consider the different layers within your design. By carving deeper in some areas and shallower in others, you can create a sense of depth and dimension. This layering adds complexity and visual interest to your work.
3. Observe the grain
Always pay attention to the grain of the wood as you layer and shape. Carving with the grain can result in smoother cuts, while carving against the grain may require extra care.
4. Use various tools
Experiment with different tools, such as gouges and chisels, to create varying depths and textures. These tools can help you achieve specific effects and details in your carving.
Adding intricate patterns
1. Plan your patterns
Before adding intricate patterns, have a clear plan in mind. Consider the motifs, shapes, and details that will enhance your design. A sketch or reference image can be helpful.
2. Begin with the background
Start by carving the background area around the patterns. This will make the patterns stand out and add depth to your carving.
3. Work from general to specific
Carve the broader patterns first and then move on to finer details. Working from general to specific ensures that you maintain an overall sense of harmony in your design.
4. Experiment with textures
Intricate patterns often involve different textures. Experiment with carving techniques like stippling, cross-hatching, or relief carving to create texture and visual interest.
5. Fine detailing
Pay special attention to the fine details of your intricate patterns. Use small gouges or fine carving knives to add precision and nuance to your work.
6. Balance and symmetry
Maintain balance and symmetry in your patterns. This is especially important if your design incorporates repetitive elements. A harmonious arrangement of patterns adds to the overall appeal.
7. Finish with sanding
Once you're satisfied with the patterns, finish your carving by sanding the surface. This not only smoothens the texture but also brings out the wood's natural beauty.
In conclusion, developing depth and texture in your Hook Knife Carving projects is a captivating and intricate process. Through layering, shaping, and adding intricate patterns, you breathe life into your designs, creating visually stunning and textured works of art. By experimenting with different techniques and maintaining a keen eye for detail, you can bring depth and richness to your carving projects.
Finishing and sanding
In Hook Knife Carving, the finishing and sanding process is the final touch that refines your creation, smoothing the surface and preparing it for finer details. It's a crucial step in bringing out the beauty of your carving and enhancing its overall appeal. In this guide, we will explore the essential steps for finishing and sanding your Hook Knife Carving projects, including smoothing the surface and preparing for finer details.
Smoothing the surface
1. Select the right grit
Choosing the appropriate sandpaper grit is key to achieving a smooth surface. Start with a coarser grit to remove any tool marks or rough spots. As you progress, move to finer grits for a smoother finish.
2. Sand in the direction of the grain
Always sand in the direction of the wood grain. Sanding against the grain can result in scratches and uneven texture. Be consistent in your sanding strokes to achieve an even finish.
3. Eliminate tool marks
Pay special attention to areas with visible tool marks. Sand these areas carefully to blend them into the surrounding wood, creating a seamless surface.
4. Check for blemishes
Inspect your carving for any remaining blemishes, uneven areas, or imperfections. Address these issues with additional sanding, ensuring that the surface is uniform.
Preparing for finer details
1. Smooth transitions
As you sand, focus on creating smooth transitions between different elements in your carving. This is especially important when there are intricate patterns or details that require a seamless flow.
2. Maintain the background
If your design includes intricate patterns, ensure that the background around the patterns is uniformly smooth. This contrast between patterns and background adds visual depth.
3. Refine carved patterns
For finer details within your carving, use sandpaper with a fine grit. This helps in shaping and refining intricate patterns, adding clarity and precision to your work.
4. Address delicate areas
When working on delicate or intricate areas, exercise caution. Light, controlled sanding is crucial to avoid overdoing it and potentially damaging the fine details.
5. Mind the corners
Pay special attention to corners and edges. Sand them gently to avoid sharp angles or splinters, ensuring a safe and polished finish.
6. Finish with a fine grit
To prepare for the application of finishes or coatings, finish sanding with a very fine grit sandpaper. This will leave your carving surface smooth and ready for further treatments.
In conclusion, finishing and sanding are the final steps in Hook Knife Carving that transform your creation into a polished and refined work of art. By carefully smoothing the surface and preparing it for finer details, you not only enhance the overall appearance but also ensure that your carving is safe to handle. With patience and precision, your Hook Knife Carving projects will become exquisite pieces that showcase your skill and creativity.
Enhancing details with stains
In the world of Hook Knife Carving, the use of stains is a powerful tool to enhance the details of your creations and bring out the natural beauty of the wood. It's a process that involves choosing the right stain and applying it with the right techniques to achieve the desired effect. In this guide, we will explore the essential steps for enhancing details with stains in Hook Knife Carving, including choosing the right stain and mastering application techniques.
Choosing the right stain
1. Consider wood type
The type of wood you've used for your carving will influence the choice of stain. Some stains work better with certain wood types. For example, lighter stains may be more suitable for woods with intricate grain patterns, while darker stains can create a rich contrast on lighter woods.
2. Test on scrap wood
Before applying the stain to your carving, test it on a piece of scrap wood from the same batch. This allows you to see how the stain interacts with your specific wood type and helps you adjust the color or intensity if needed.
3. Transparency and opacity
Stains come in various levels of transparency and opacity. Transparent stains allow the wood's natural grain to show through, while opaque stains provide more consistent color coverage. Choose the level of transparency that aligns with your design and the desired effect.
4. Color harmony
Consider the color harmony between your carving and the stain. Ensure that the stain complements the design and brings out the details without overpowering them. The color should enhance the overall aesthetic.
5. Protecting the stain
After applying the stain, you may want to protect it with a clear finish like varnish or lacquer. The finish not only preserves the stain but also adds depth and shine to your carving.
Application techniques
1. Surface preparation
Ensure that the surface of your carving is smooth and free from any dust or debris. Sand the wood carefully to a fine finish before applying the stain.
2. Apply evenly
Use a brush, sponge, or cloth to apply the stain evenly across the entire surface of your carving. Work in the direction of the grain, using long, smooth strokes. Avoid over-saturation, which can result in uneven color.
3. Wipe excess stain
After applying the stain, wait for a few minutes to let it penetrate the wood. Then, use a clean cloth to wipe off any excess stain. This step helps achieve an even finish and prevents streaks or blotches.
4. Layering
For more intense color or depth, consider applying multiple layers of stain. Allow each layer to dry before adding the next. This approach allows you to build up the desired effect gradually.
5. Dry and cure
After applying the stain and any protective finish, let your carving dry and cure thoroughly. Follow the manufacturer's instructions for drying times, which may vary based on the products used.
In conclusion, enhancing details with stains in Hook Knife Carving is a creative and impactful process that can transform your work into a masterpiece. By choosing the right stain and mastering the application techniques, you can highlight the intricate patterns and textures of your carving, creating a visually stunning and harmonious result.
Preserving your artwork
Once you've invested time and creativity into your Hook Knife Carving masterpiece, preserving it for the long term is essential. This involves sealing and protecting the carving and following maintenance tips to ensure its beauty endures over time. In this guide, we will explore the crucial steps for preserving your Hook Knife Carving artwork, including sealing and protecting the carving and providing maintenance to keep it in pristine condition.
Sealing and protecting the carving
1. Choose the right finish
Select an appropriate finish to seal and protect your carving. Common options include varnish, lacquer, or natural oils like linseed oil or tung oil. The choice depends on the look you desire and the type of wood used.
2. Brush or cloth application
Apply the chosen finish using a brush or a clean cloth. Ensure even coverage across the entire carving. Work in the direction of the grain for a uniform finish.
3. Multiple coats
For lasting protection, consider applying multiple coats of the finish. Allow each coat to dry completely before adding the next. Additional coats enhance durability and sheen.
4. Drying time
Follow the manufacturer's instructions regarding drying times. Depending on the type of finish used, drying times can vary. Proper drying ensures the finish sets and provides maximum protection.
5. Consider a clear coat
For added protection and shine, apply a clear topcoat. This layer adds depth to the finish and enhances the overall appearance of your carving.
Maintenance tips
1. Avoid direct sunlight
Direct sunlight can fade and damage your carving over time. Display your artwork away from direct sunlight or consider UV-protective glass if framing.
2. Dust regularly
Dust your carving regularly to prevent the buildup of dirt and debris. Use a soft, dry cloth or a gentle brush to remove dust particles. Be gentle to avoid scratching the finish.
3. Climate control
Maintain a stable indoor environment for your carving. Fluctuations in humidity and temperature can cause wood to expand and contract, potentially leading to cracks. Use a dehumidifier or humidifier as needed.
4. Handle with care
Handle your carving with clean, dry hands. Oils and dirt from your skin can transfer to the wood and affect the finish. Avoid touching the carving's surface whenever possible.
5. Inspect for damage
Regularly inspect your carving for any signs of damage, including cracks, chips, or wear on the finish. Promptly address any issues to prevent further deterioration.
6. Reapply finish
Over time, the finish may wear down. Consider reapplying the finish to maintain protection and enhance the appearance of your carving.
In conclusion, preserving your Hook Knife Carving artwork is vital to ensure it remains a testament to your creativity and craftsmanship. By sealing and protecting the carving with the right finish and following maintenance tips, you can extend the life and beauty of your carving, allowing it to be cherished for generations to come.
The artistry of hook knife carving
Hook Knife Carving is not merely a craft; it's an art form that allows you to express your unique style and infuse your personality into your creations. This artistry is a journey of self-expression and personalization. In this guide, we will delve into the profound aspects of the artistry of Hook Knife Carving, including expressing your unique style and personalizing your creations.
Expressing your unique style
1. Explore inspiration
Begin your journey by exploring various sources of inspiration. Look to nature, culture, history, and personal experiences. By drawing inspiration from diverse influences, you can begin to shape your unique style.
2. Develop a signature
As you gain experience in Hook Knife Carving, you will naturally gravitate toward certain techniques, themes, or motifs. These preferences become part of your signature style. Embrace them and allow them to shine through in your work.
3. Experiment and innovate
Artistry thrives on experimentation and innovation. Don't be afraid to push the boundaries of traditional carving techniques. Introduce new elements, incorporate unconventional materials, or create hybrid styles that are entirely your own.
4. Embrace imperfections
Imperfections can be beautiful. Embrace the uniqueness of handmade creations. Imperfections and quirks in your carvings can add character and make them truly one-of-a-kind.
Personalizing your creations
1. Storytelling
Carvings can tell a story. Infuse your personal experiences, memories, and emotions into your work. Whether it's a piece that commemorates a special moment or one that conveys a feeling, personal narratives make your creations deeply meaningful.
2. Customization
Consider offering customized carvings. This allows you to connect with clients on a personal level and create pieces that hold deep sentimental value. Tailoring your work to specific preferences can be a fulfilling aspect of Hook Knife Carving.
3. Collaborations
Collaborate with others who share your passion. Working with fellow artists, designers, or clients on collaborative projects can lead to unique and inspired creations that reflect both your vision and the vision of others.
4. Signature mark
Consider adding a signature mark to your carvings. It can be as subtle as a small, engraved symbol or as bold as your full name. This mark identifies your work and leaves a lasting impression.
5. Educate and share
Part of personalization involves sharing your knowledge and passion for Hook Knife Carving. Educate others about the art form, share your experiences, and help them appreciate the beauty and craftsmanship behind your creations.
In conclusion, the artistry of Hook Knife Carving is a deeply personal and creative journey. It's about expressing your unique style, embracing imperfections, and personalizing your creations with meaningful narratives. As you explore your own artistic path, remember that Hook Knife Carving is not just a craft; it's an art form that allows you to leave your mark on the world through your stunning and personalized carvings.
Inspirational masterpieces
In Hook Knife Carving, the path to mastery often involves drawing inspiration from the works of notable carvers and learning from the techniques and wisdom of the masters. Examining the intricate details and artistry of these masterpieces can be both inspiring and educational. In this guide, we will explore the enlightening journey of examining notable carvings and learning from the masters in the realm of Hook Knife Carving.
Examining notable carvings
1. Appreciating artistry
Notable carvings are a testament to the heights that can be achieved in Hook Knife Carving. These masterpieces showcase the artistry, creativity, and dedication of their creators. By examining and appreciating these works, you can gain a deeper understanding of the potential within the art form.
2. Exploring diversity
The world of Hook Knife Carving is rich and diverse. Notable carvings come in various styles, themes, and forms. Exploring this diversity can broaden your horizons and expose you to new ideas and possibilities for your own creations.
3. Analyzing details
Notable carvings often feature intricate details that are worth close examination. Analyzing the techniques used to achieve these details can provide valuable insights into the craftsmanship behind the artwork.
4. Finding inspiration
Notable carvings can serve as a wellspring of inspiration for your own projects. The beauty and creativity of these works can spark fresh ideas and ignite your passion for Hook Knife Carving.
Learning from the masters
1. Study techniques
Masters in Hook Knife Carving have honed their techniques over years of practice. Learning from them involves studying the methods they use to achieve precision, depth, and texture in their carvings.
2. Seek mentorship
If possible, seek mentorship from experienced carvers who have achieved mastery in the art. Personal guidance and feedback from a mentor can accelerate your learning and provide valuable tips and tricks.
3. Attend workshops and classes
Many accomplished carvers offer workshops and classes to share their knowledge. Participating in these sessions can provide hands-on experience and direct interaction with masters of the craft.
4. Learn the history
Understanding the history of Hook Knife Carving and the contributions of master carvers is an important aspect of learning from the masters. It allows you to appreciate the evolution of the art form and the cultural significance of various styles.
5. Emulate and innovate
While learning from the masters, it's essential to strike a balance between emulating their techniques and innovating with your unique style. Use what you learn as a foundation to develop your artistry.
In conclusion, the world of Hook Knife Carving is enriched by the works of notable carvers and the wisdom of the masters. By examining notable carvings and learning from those who have achieved mastery, you can gain a deeper appreciation for the art form and accelerate your own journey to becoming a master carver. Remember, in Hook Knife Carving, learning is a lifelong and inspirational endeavor.
Troubleshooting common issues
In the world of Hook Knife Carving, like any artistic pursuit, challenges may arise. These challenges can range from splintering of the wood to design flaws. Troubleshooting and problem-solving are integral parts of the creative process. In this guide, we will explore common issues that carvers encounter and how to address them effectively.
Dealing with splintering
1. Sharp tools
Ensure that your carving tools, particularly the hook knife, are sharp and well-maintained. Dull tools can cause splintering as they tear through the wood instead of making clean cuts.
2. Grain direction
Pay attention to the grain direction of the wood. Carving against the grain is more likely to result in splintering. Work with the grain whenever possible for smoother cuts.
3. Lighten pressure
Avoid using excessive force when carving. Instead, use controlled and gentle pressure. Let the sharpness of your tools do the work, and guide them with a steady hand.
4. Smoothing the edges
If splintering occurs along the edges of your carving, consider using sandpaper to smooth and refine those areas. Sanding can help remove splinters and achieve a cleaner finish.
Fixing design flaws
1. Identify the flaw
Before attempting to fix a design flaw, carefully identify the issue. Is it a proportion problem, an unwanted texture, or a structural error? Understanding the nature of the flaw is the first step.
2. Adjustment techniques
For proportion issues, consider carefully removing or adjusting the problematic area. This may involve re-carving or smoothing the wood to achieve the desired proportions.
3. Texture corrections
If the flaw relates to texture or surface details, experiment with different carving techniques to alter the texture or create a new pattern that conceals the flaw.
4. Fill and blend
In some cases, design flaws can be filled with wood filler or epoxy. Once filled, blend the filler with the surrounding wood by carving or sanding to create a seamless appearance.
5. Learn from mistakes
Every design flaw is an opportunity to learn and improve. Embrace your mistakes as valuable lessons that contribute to your growth as a carver. Avoid dwelling on errors, and focus on how to avoid them in the future.
6. Seek feedback
If you're unsure about how to fix a design flaw, seek feedback from fellow carvers, mentors, or experts. They may offer valuable insights and solutions you hadn't considered.
In conclusion, in the realm of Hook Knife Carving, encountering challenges and troubleshooting common issues is a natural part of the creative process. Addressing splintering and fixing design flaws requires a combination of technique, creativity, and problem-solving. Embrace these challenges as opportunities to enhance your skills and create even more remarkable carvings.
Summary
Hook Knife Carving is a captivating art form that allows individuals to craft intricate and detailed masterpieces. In this comprehensive guide, we've explored various aspects of Hook Knife Carving, from understanding the basics to mastering intricate details. Let's recap the key takeaways from our journey:
Key takeaways
-
Craftsmanship and artistry: Hook Knife Carving is both a craft and an art form, allowing carvers to express their creativity and unique style through intricate designs.
-
Wood selection: The choice of wood is crucial. Different types of wood offer various characteristics and grain patterns that can enhance the overall appeal of a carving.
-
Workspace preparation: Creating a well-organized and safe workspace is essential for a successful carving project. Proper tool arrangement and safety precautions are vital.
-
Knife handling: Mastering different grips and techniques is key to creating precise and detailed carvings while avoiding common mistakes.
-
Design and layout: Finding inspiration, sketching, and creating templates are the initial steps in transforming a concept into a tangible design.
-
Depth and texture: Developing depth and texture in your carvings involves layering, shaping, and adding intricate patterns to create visually stunning results.
-
Finishing and sanding: The finishing and sanding process is essential to create a polished and refined surface, preparing it for finer details and enhancing the overall appearance.
-
Stains for enhancement: Choosing the right stain and applying it with the appropriate techniques can bring out the details in your carvings, adding depth and beauty.
-
Preservation and maintenance: Properly sealing your carving and following maintenance tips help ensure the longevity and continued beauty of your artwork.
-
Artistic expression: Hook Knife Carving allows you to express your unique style, embrace imperfections, and personalize your creations, making each piece a reflection of your creativity and individuality.
The journey to intricate details
The journey to mastering Hook Knife Carving is a path of continuous learning, inspiration, and artistic expression. As you examine notable carvings and learn from the masters, you'll gain valuable insights and elevate your skills. Troubleshooting common issues, such as splintering and design flaws, is a part of the creative process and an opportunity to refine your craft.
Through this artistic journey, you'll find yourself creating inspirational masterpieces that capture the beauty of the natural world and your own unique vision. Whether you're a seasoned carver or just starting, Hook Knife Carving offers a boundless realm of creativity, where your passion and artistry can shine.
Remember that every carving tells a story, and every flaw is a stepping stone to improvement. Your artistry in Hook Knife Carving is a reflection of your dedication, patience, and the love you pour into each masterpiece.