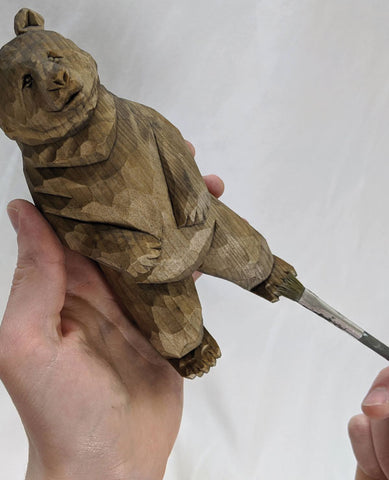
How to carve a bear? Wood carving

Carving figures is always very interesting. And in this blog we want to share with you about how to carve a bear.
How to carve a bear? Wood carving
Bear carvings have been part of North American culture for centuries. The giant creatures have come to represent courage, family, health, strength, and vitality in the mind of the public. Although they are not as cuddly in the wild as they appear in the town zoo. But in here we will give the instruction how to carve a small bear.
Getting started
Sketch the side and front view patterns onto an appropriately sized block of wood—the front view goes on the 3 1/4″ by 6 3/4″ (8.3 by 17.2cm) face and the side view goes on the3″ by 6 3/4″ (7.6 by 17.1cm) face. Using a band saw or coping saw, rough out the front view, leaving little tabs of wood between cuts so that wood does not fall off at this point. Saw between the ears, and then all the way around the perimeter of the side view pattern. Remove all waste wood.

Even though bears might seem big and scary, this one is actually relatively simple to carve. There are few defining shapes and lines, but that means that each line carries additional weight in making the bear look awesome. Notice how the front paws are angled opposite to the lines formed by where the legs meet the body. This is just a small trick to add visual interest.
Carving the bear
Using a knife, remove wood from under the muzzle and narrow the face toward the muzzle with flat planes. Carve a deep stop cut into the back of each leg, and then carve down and up to it until you reach your desired depth. Round the legs up to a large and bold V-shaped junction and the belly into this junction slightly on both sides. Then round the legs downward into the feet and meet this cut from the top of the feet.

With the entire edge of your knife, cut long, V-shaped channels around the arms. Slice wood away from the sides of the chest, and then use the top half of the knife to further shape the arms and chest, cutting up toward the neck as you hold the figure upside down. Join two bold, slanted stop cuts in the middle of the chest to add a scruffy roll of fur under the chin, and then carve up to those stop cuts. Add additional lines to the backs of the legs.
Scoop out the eye sockets by cutting in from the muzzle and twisting your wrist to guide the knife out before cutting through the eye sockets. Carve between the ears. Carve out simple, triangular chips from the ears, carve a horizontal line for the mouth, and add a few nostril incisions. Carve the eyes and separate the claws.

Painting and finishing
Paint the bear. Start with a base coat of thinned brown oxide and follow that with your preferred accents. Add the final white eye dot with the tip of a toothpick. Let dry and spray with your finish of choice.

Paint notes
- Base coat: brown oxide, black
- Iris: melted chocolate
- Rest of eyes: black
- Eye reflection: white
- Muzzle: country tan
- Body: burnt umber, toffee (toffee is drybrushed on)


